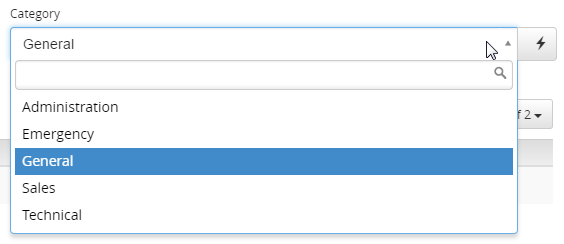
Drop down selection fields are one of the most comfortable components of forms because they allow to propose certain values to users or to restrict the input options. In the following I'll show you how to easily create a drop down selection field in Protogrid.

We start from a simple application called "document storage", which contains the simple Proto "Document". This Proto currently defines a field for the name of the document and the possibility to attach files to documents. The Quickstart Tutorial leads you step by step through the creation of such an application. Now we also want to be able to choose a category for documents by selecting values in a drop down field.
Create the Proto "Category"
First we create a new Proto (see the quick start tutorial chapter 8 for details): In the menu entry "Protos" we "Create" a new Proto, which is named "Category" and the plural "Categories". We save the Proto and add the necessary fields. To do this, in section "fields and widgets" we create a field of typ "text-field-definition". In the opening card, we configure the new textfield and choose the label "Category name" and the help text "Enter the name of your category here". Since every category needs a name, this field is mandatory. Clicking "Save & Close" we leave the text field definition and get redirected to the "Category" Proto.Create a relation field
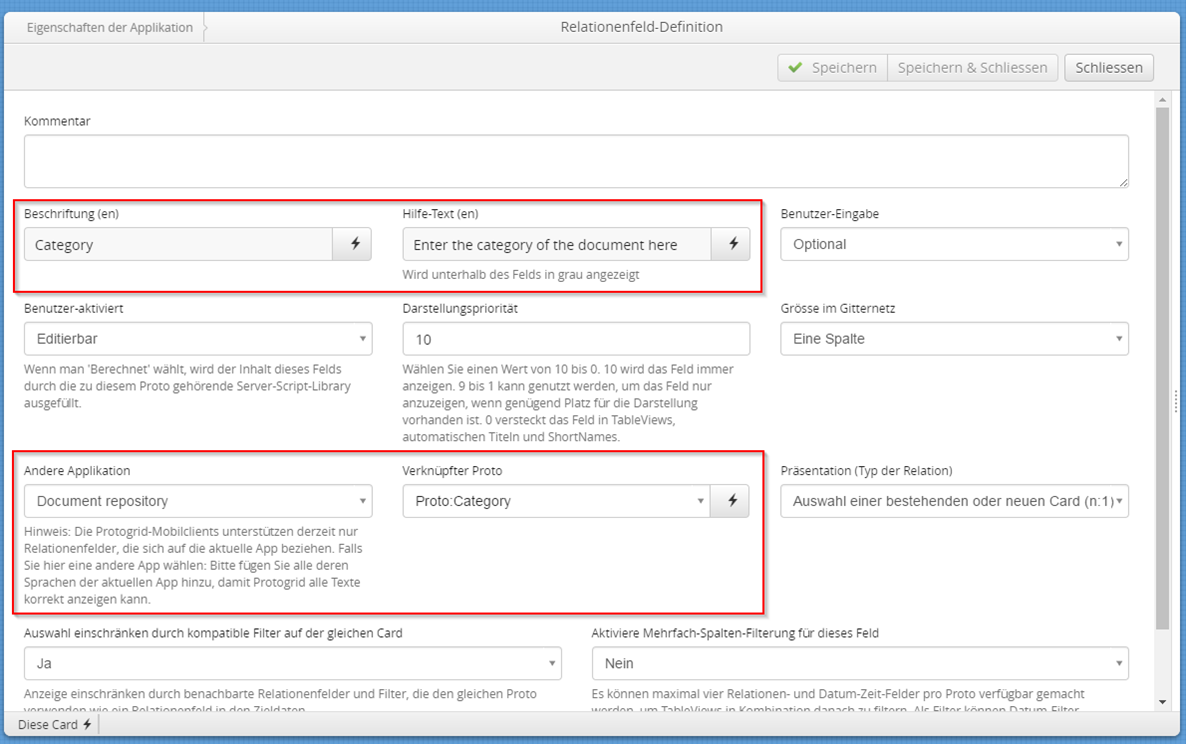
Now we can insert our selection field into the existing Proto "Document". In the menu entry "Protos" we open the Proto "Document". In the section "field and widgets", we now add a new field of type "relation field definition". Now we add a name and a help text for which we choose "Category" and "Enter the category of this document here". As "Related application" we choose the application we are working on, since the Proto we want to link (our Categories) are in this application. As "Related Proto" we choose "Proto:Category", our newly created Proto.With "Save and Close" we finish the creation of this field. Our drop down selection field is ready.

Define Categories and Use the Field
Before we can upload Documents now, we need to define the selectable categories. Therefore we click in the menu entry "Categories" and create a new Card, where we define the name of the category. We choose "General" and "Save and Close" the Card. Create several such categories, to have a nice selection list (e.g. "Administration", "Emergencies", "Technical", "Sale").When creating a new document, we see the new field "Category". By clicking on this field, a list of all created categories appears. From now on, you can choose your prefered category.


